


Oh, that sinking feeling when your car refuses to start. Probably the battery, yes? You won’t know until you’ve had your battery tested. This could mean expensive towing costs and a lot of unwanted disorder and mayhem. Surely there must be a better way.
DIY car battery testing doesn’t require great skill, you certainly don’t have to be a mechanic to perform the necessary tests safely at home. All you need is a multimeter capable of measuring 12VDC or a 12V battery tester. Neither of these items need be too expensive and can be kept in your car. They’re compact and weigh very little.
I’m going to start with the most comprehensive way of testing your car battery and alternator using a multimeter. This gives a good overview of more than just the condition of your automotive battery but the alternator that charges the battery too. Both are equally important to ensure that your car starts reliably every time you turn the key.
For a quicker, easier battery testing option, a battery tester is designed to provide an instant assessment of your battery voltage and some other parameters, depending on the type of charge tester you’re using.
Sophisticated battery testers do quite detailed testing like internal resistance which ascertains whether your battery has deteriorated beyond the point of no return, or is close to the end of its usable life. The main advantage of using a battery tester as opposed to a multimeter is that a good battery tester provides an overview of the general battery health.
How to Test a Car Battery With a Multimeter
While you really don’t need much auto repair experience to measure battery voltage using a multimeter, I’m going to assume you at least have a basic working knowledge of simple vehicle repairs and maintenance. It should be a given that you know how to open the hood and locate your car battery.


Ah, but we could have already encountered our first obstacle at this early stage. Some cars have the battery in the trunk. This has been a source of confusion for many. To complicate things even further, batteries are often concealed and cannot be easily found unless you know where to look. Your owner’s manual will help you in this endeavor.
Testing a 12V Lead Acid Battery
Okay, you know where your battery is and how to access it. We’re off to a good start.
Locating The Battery Terminals
Now you’ll need to identify your positive (+) terminal and negative (-) terminal on your battery. As a rule, positive battery wires are red and negative is black, sometimes brown. The negative wire could also be uninsulated, recognizable by exposed copper or a dull greyish metal alloy wire.
Battery cables are thicker than most other electric wires. The average battery cable is 4 to 6 gauge. Larger trucks and SUVs can have even thicker 2-gauge cables. Regardless of the actual gauge, battery terminal cables will always be the thickest on any vehicle, they’re easily identified.
If you’re having trouble locating the positive and negative battery terminals, there’s a sure-fire way to be certain. Trace the negative cable to its grounding point. A negative terminal on every car battery is grounded to the car body. By following the battery wires with your hand, you’ll soon encounter a bolt attached to the car body, close to the battery. A bunch other black or brown wires are usually connected to the same lug. This is the one of several negative grounding lugs on the car.
The entire body of your car is a negative conductor, and the grounding points provide you with excellent conductivity for a negative connection when performing any voltage testing on a vehicle. You can connect your multimeter, test light, or battery tester black probe directly to the negative battery terminal or any place on the car body that has good conductivity.
Getting Your DMM Set up Right
Now we’re set to measure the battery voltage. Switch your multimeter on and turn the selector dial to the DC voltage closest to and higher than 12V. Hmm, perhaps we should pause for a while here. Not everyone is too familiar with how a multimeter works. Skip past the next two paragraphs if you understand your DMM well.
Most multimeters require the user to select the type of function you require DCV, ACV, amps, frequency, and several other functions. You’ll also be required to select a range for these measurements to ensure the best calibration for the reading that will be displayed on the LCD screen.
Essentially, you want to select a range that is close to your expected voltage. However, you cannot measure a voltage higher than the selected range. Since we know the nominal voltage for a car battery is 12V, you’ll want the number closest to 12, allowing for a higher reading. This is usually 20V. Note that I rate battery voltage as nominal 12V. You will seldom find a battery that is at exactly 12V. A healthy battery can be as low as 10V if it has been left to discharge for a long time without sufficient charging. A fully charged battery, in good condition should supply a voltage higher than 12V.
With your multimeter now set up to measure DC voltage in a range suitably close to 12V, you’re ready to get cracking. A multimeter has two probes with sharp points that make it easy to find a good point of contact for reliable measurements. Alligator clamps, a common multimeter accessory, can make things a little easier. Press the probes, or attach the alligator clamps to the battery terminals. Connecting the black wire to the negative battery terminal and red to positive. Do this with the engine switched off.
Negative Reading
If you measure negative voltage, like -12.5, the polarity has been reversed. It simply means that the negative and positive probes of your multimeter are making contact with the wrong battery terminal. Swapping the red and black probes to the opposite battery terminal, will rectify the situation.
12V – 13V Reading
If your battery is in good condition and in a good state of charge, the voltage will be 12V – 13V. Even a battery that is completely depleted and ready for recycling should be discharging a small voltage of 4V – 5V.
If you see a reading of 0V – 1V, check that the multimeter probes are making good contact with the conductor. You may need to clean the battery terminals with soap and hot water to remove oxidization, grease, and dirt. A light rub with a piece sandpaper can help too.
11V or Lower Reading
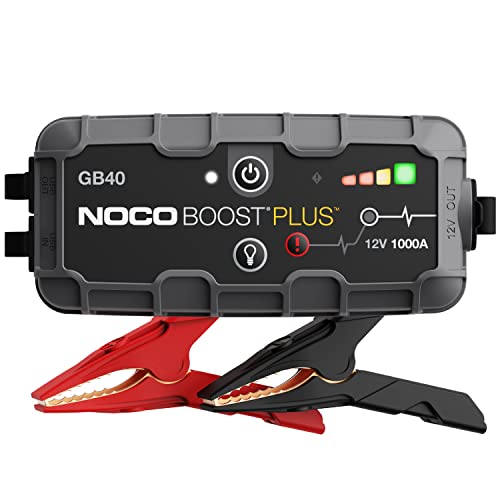
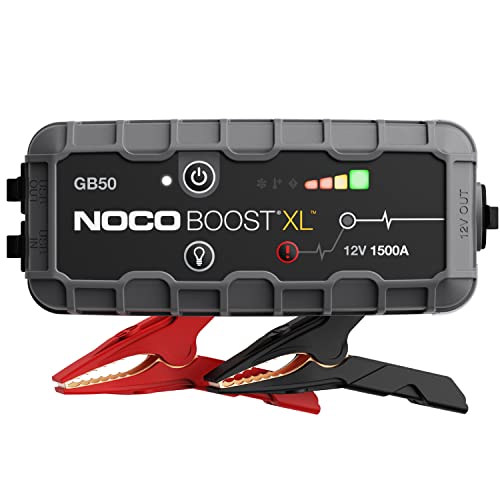
If the battery voltage is 11V or lower, it’s unlikely that the car will start. Lower than 10V, you can be sure it won’t. You now have a few options, remove the battery and connect it to a reliable battery charger. The alternative is to jump start the car using jumper cables or a battery booster. The latter being easier as it has a built-in battery and does not require a second vehicle to park alongside your car which is not always feasible.



Cranking Voltage Test
For the last step of your battery test, you’ll need someone to help. Keep your multimeter connected to the battery terminals and perform a cranking voltage test to measure how well your battery maintains voltage when the starter motor draws heavy current to crank the engine.
You’ll need to check the voltage reading on the multimeter while someone cranks the engine by turning the ignition key. A good car battery should not drop below 10V under load. If you observe voltage above 10V whilst the starter motor is cranking the engine, your battery is in good condition.
Lithium Ion Car Batteries
Lithium ion car batteries are used for EVs but not much for conventional automotive use. They’re much more expensive than VRLA (Valve Regulated Lead Acid) batteries which have been used to supply 6V and 12V power to vehicles for over a century. To test a 12V lithium ion battery with a multimeter, follow the same procedure as when testing a lead acid battery. It is not safe to test EV lithium ion batteries without appropriate training, it is potentially dangerous as these batteries produce around 360V.
Testing a Car Alternator
Once you’ve tested your battery, it is sensible to test the alternator. All the work has already been done. You’ve tested the battery with the engine off. The alternator is, therefore, not charging the battery. Start the engine and measure the battery voltage again. With the engine running, the alternator should be providing a charge of approximately 14V.
If you measure a charge voltage at the car battery between 13.5V and 14.5V all is well. Since even the best multimeter isn’t 100% accurate you can expect a slight deviation but this shouldn’t be much more than 0.1V even when using the cheapest DMM.
Charging Higher Than 14.5V
If the alternator is charging higher than 14.5V (±0.2V) switch off the engine and consult an auto electrician. Overcharging a battery at excessively high voltages is extremely dangerous and can detrimentally harm the battery.
Charging Lower Than 13V
Charging below 13V can result in underperformance and gradual battery deterioration. Cars 15-years or older can be forgiven for slight underperformance, perhaps as low as 12.8V but the dangers of overcharging remain serious regardless of the age or general condition of your car.
If your alternator is undercharging (<13V) it should be inspected by an auto electrician as well. Often, the rectifier is the villain. If your DMM has a diode tester, you can use this to determine the condition of the rectifier, which is cheap and easy to replace on most modern alternators.
Testing Your Car Battery with a Battery Tester
We’re really spoilt for choice when it comes to good battery testers. There are many variations, from models specifically designed to test 12V lead acid batteries to multiple battery types.
Car and deep cycle battery testers, used for RVs, golf carts, and other leisure activities, are probably the most common. These testers are also suitable for testing AGM (Absorbent Glass Mat) batteries used for long charge and discharge cycles, mostly off-grid renewable electricity generating systems, like solar.


Standard 12V battery testers can’t be used to test lithium ion batteries beyond a basic discharge voltage test. Since the best 12V lithium ion batteries have built-in battery management systems (BMS), the battery is being constantly monitored. All the work is done for you if your Li-ion battery utilizes a BMS.
A digital car battery tester is a joy to own. Not only does it simplify battery testing, it usually does a whole lot more and is child’s play to use.
You should read your battery charger owner’s manual before using it for the first time. These are not overly complicated devices and operate in very similar ways. This basic guide on how to use a battery tester should cover all bases but it would be prudent to check any details that may be pertinent to using a specific model.
Locate your car battery and connect your battery tester to the battery, following the same procedure as I’ve described for testing a battery with a multimeter. Once both positive and negative probes have been connected to the battery, the tester should power up immediately. You may be required to switch it on manually for some models.
The home screen on your battery tester will usually give you an instant voltage reading. If your battery is fully charged and in good condition, this should be 12V – 13V. Your battery tester may have a menu button or simply two scrolling arrows. Press the menu or scroll up to access other testing functions which would typically include the following modes: battery test; cranking test and charging test. It may often have other functions like reviewing stored data.
The charge test is one of the most important functions on a battery tester. Before the tester will perform a charging test, you’ll need to select the correct attributes for the battery fitted to your car. You’ll be required to identify the type of battery from a list on the screen. A regular car battery is known as a flooded lead acid battery. Look for the description that matches your car battery. Quite often this will be displayed simply as “Flooded”. You will also have to enter the battery amps which is displayed on the battery. Every battery has a label listing important specs.
Once you’ve set up the tester, press the test button and allow a few seconds for the test function to be completed. After completing a charge test, it will display a few pieces of really valuable information. This should include battery health by comparing the actual discharge amperage to the amps that you obtain from the battery specs and enter into the machine. It will measure the charge voltage and rate this, as well as internal resistance.
A battery tester measures the charge capacity of a battery. A battery may deteriorate to a point where it can no longer charge completely even when the alternator is functioning well. If the battery test reveals a clean bill of health, yet it is not charging, the alternator needs to be tested using a multimeter. A battery tester cannot test an alternator.
Finally, the tester will give you a simple overview of the battery’s general condition which could be expressed as good, fair, poor or words similar to this.
Understanding the data provided by a battery tester is deliberately simple. It is not a complicated machine and won’t scare away even the least tech-savvy amongst us. A great thing to keep in your car at all times.
What to do?
Advice articles that offer additional options can leave you with new questions that need to be answered. Not exactly the aim when offering constructive advice. If you’ve been left scratching your head in a “what to do?” manner, trying to decide between a multimeter or a battery tester, I have to make amends. My intention was to provide good advice, not add more confusion. Perhaps we can set the record straight with a little nudge toward making an informed decision.
A battery tester is easier to use and remains the best way to test a battery because it conducts a few additional tests automatically that you simply can’t perform with a multimeter.
True, you can always establish whether your battery and alternator are functioning correctly using a multimeter but you won’t have the additional piece of mind that a battery tester offers. Which is a more comprehensive overview of the longer term prospects for your car battery. Pros in the battery supply industry all use high-end battery testers.
“If you never intend to use a multimeter for anything except testing your car battery, a battery tester would be a wiser choice. It is cheaper and provides the best way to test a car or deep cycle battery.”
If, like me, you see a myriad of possibilities when checking multimeter specs, the decision is simple, you’re going to get yourself a good quality DMM. This could be simply for the diversity of functions it provides.
Although a multimeter provides accurate voltage testing for a car battery, it doesn’t do all the tasks that a battery tester does. Consider a battery tester as a pretty cool optional extra, not a real necessity, if your first choice is a DMM.
Got questions? Drop them in the comments section below — I’d love to help!

